
Connect Amazon Redshift
This guide shows you how to connect Amazon Redshift to NVECTA as a source. It works for both provisioned Redshift clusters and Redshift Serverless.
Once Redshift is connected, you can build models on its tables. For the full flow from source to models, see Setting up sources and models.
Before you begin
- Access to Redshift: You need access to the Amazon Redshift console to find your connection details, and a user who can create users and grant permissions, such as an admin user.
- Your data in place: One user master table and your event tables, in the shape described in How user and event models connect.
- Network access: Redshift must accept connections from NVECTA. You set this up in Step 3.
Step 1: Create a read-only user for NVECTA
Create a dedicated Redshift user for NVECTA, so you control exactly what it can read. NVECTA only needs to read your data.
Run these commands in the Redshift query editor as an admin user. Replace analytics with the schema that holds your user and event tables, and choose your own password.
-- Create the user NVECTA will connect as
CREATE USER nvecta_reader PASSWORD 'Choose-A-Strong-Password1';

-- Let the user see the schema and read its tables
GRANT USAGE ON SCHEMA analytics TO nvecta_reader;
GRANT SELECT ON ALL TABLES IN SCHEMA analytics TO nvecta_reader;

-- Let the user read tables you create in this schema later
ALTER DEFAULT PRIVILEGES IN SCHEMA analytics GRANT SELECT ON TABLES TO nvecta_reader;
- More than one schema: Repeat the
GRANTandALTER DEFAULT PRIVILEGESlines for each schema NVECTA should read. - Tables created by other users:
ALTER DEFAULT PRIVILEGESonly covers tables created by the user who runs it. If another user or a pipeline creates your tables, addFOR USERfollowed by that user's name, or run the command as that user. - Password rules: Redshift passwords must be 8 to 64 characters long and include at least one uppercase letter, one lowercase letter and one number.
Step 2: Find your connection details
NVECTA needs three details from the Amazon Redshift console. All of them are part of your endpoint, which looks like this:
customer-dw.c1a2b3c4d5e6.ap-south-1.redshift.amazonaws.com:5439/customer_db
| NVECTA field | What to enter | Where to find it |
|---|---|---|
| Host | The endpoint without the port and database, for example customer-dw.c1a2b3c4d5e6.ap-south-1.redshift.amazonaws.com | Provisioned cluster: open your cluster and copy the Endpoint under General information. Redshift Serverless: open your workgroup and copy its Endpoint. |
| Port | The number after the colon in the endpoint. The default is 5439. | The end of the endpoint. |
| Database | The name after the slash in the endpoint, for example customer_db. | The end of the endpoint, or your cluster or namespace properties. |
Step 3: Allow NVECTA to reach Redshift
If your Redshift has a firewall, whitelist NVECTA's IP addresses in it. To get the IP addresses, contact [email protected].
- Redshift reachable over the internet: Turn on Publicly accessible for your cluster or workgroup, then add an inbound rule to its VPC security group that allows your Redshift port from NVECTA's IP addresses.
Step 4: Add Redshift in NVECTA
Where: Settings > Data Connector > Sources > Add New Source
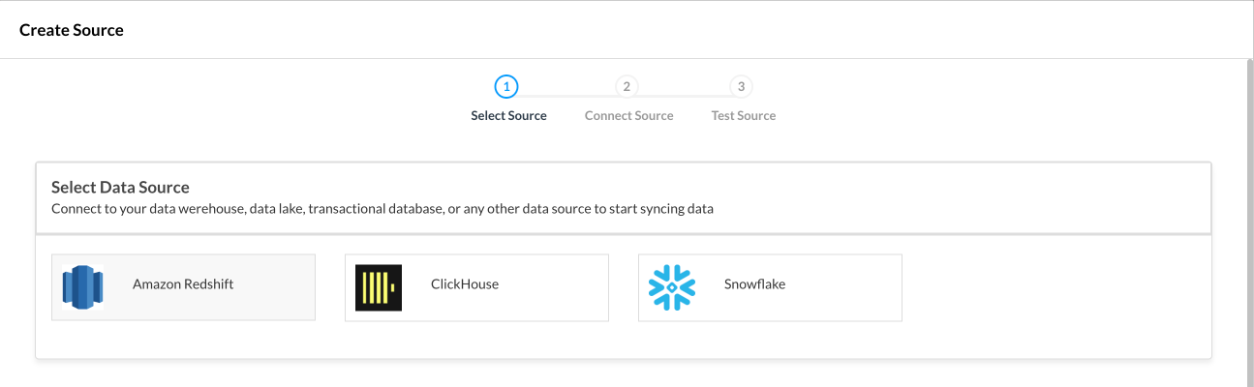
Select Amazon Redshift
Select Amazon Redshift and click Continue To Connect.
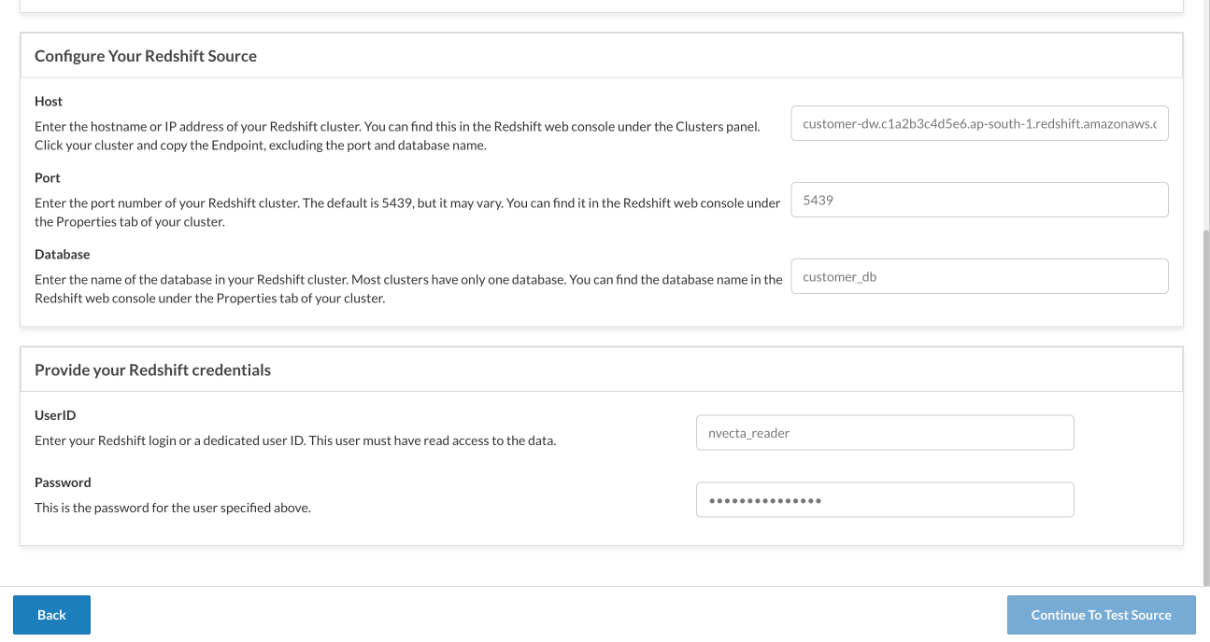
Enter your connection details
- Enter a Source Name, for example "Customer data warehouse".
- Under Select Connection Type, select Connect directly to Redshift.
- Under Configure Your Redshift Source, enter the Host, Port and Database from Step 2.
- Under Provide your Redshift credentials, enter the UserID and Password of the user you created in Step 1.
- Click Continue To Test Source.
Test the connection
NVECTA checks the connection, the login and the user's permissions. When every check shows success, click Finish.
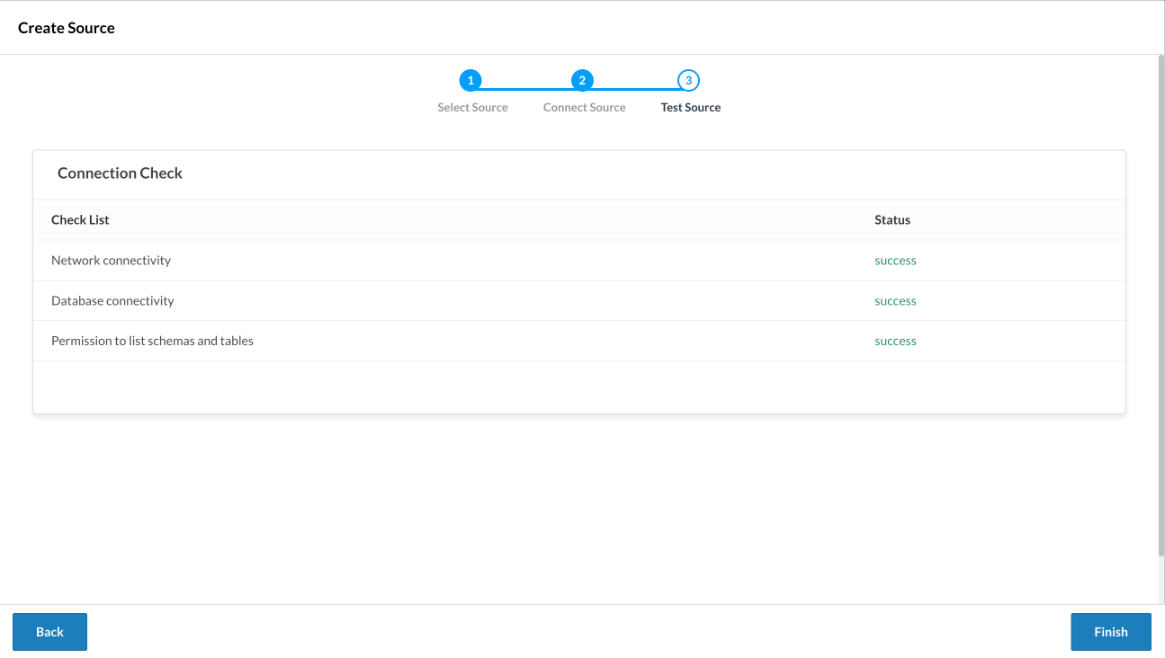
Your Redshift source now appears in the Sources tab, ready for models.
Troubleshooting
| Problem | Likely cause | What to do |
|---|---|---|
| Network connectivity fails | NVECTA cannot reach the host and port. | Check the Host and Port, make sure the cluster or workgroup is publicly accessible, and check the security group inbound rule. |
| Database connectivity fails | The database name, user or password is wrong. | Check the Database, UserID and Password, and make sure the user exists in that database. |
| Permission to list schemas and tables fails | The user cannot see the schema. | Run the GRANT USAGE command from Step 1 for each schema. |
| A table is missing from Table Selector, or a model shows a permission error | The table was created after you granted access, and default privileges do not cover it. | Run the GRANT SELECT ON ALL TABLES command again, and set up ALTER DEFAULT PRIVILEGES for the user who creates the tables. |
| A SQL Query model fails with "relation does not exist" | The query does not include the schema name. | Write table names as schema.table, for example analytics.users. |
What's next
Create a user model and your event models on this source. See Setting up sources and models.
Updated about 2 hours ago