
Connect Snowflake
This guide shows you how to connect Snowflake to NVECTA as a source, using a dedicated read-only user that signs in with a key pair.
Once Snowflake is connected, you can build models on its tables. For the full flow from source to models, see Setting up sources and models.
Before you begin
- Access to Snowflake: You need a Snowflake role that can create roles, users and grants, such as ACCOUNTADMIN, and a terminal with OpenSSL to create a key pair.
- Your data in place: One user master table and your event tables, in the shape described in How user and event models connect.
- A warehouse for NVECTA's queries: NVECTA runs queries on a Snowflake virtual warehouse. You can use an existing one or create a small one just for NVECTA in Step 2.
Step 1: Create a key pair
NVECTA recommends key pair sign-in for Snowflake. You keep the private key and give it to NVECTA, and Snowflake stores the matching public key on the user.
Run these commands in a terminal. The first one asks you to set a passphrase that protects the private key. Keep it, because you enter it in NVECTA later.
# Create an encrypted private key
openssl genrsa 2048 | openssl pkcs8 -topk8 -inform PEM -out nvecta_key.p8

# Create the matching public key
openssl rsa -in nvecta_key.p8 -pubout -out nvecta_key.pub
Open nvecta_key.pub and copy the key text between the BEGIN PUBLIC KEY and END PUBLIC KEY lines, without those lines. You use it in Step 2.
Step 2: Create a role and user for NVECTA
Run these commands in a Snowflake worksheet. Replace the warehouse, database and schema names with your own, and paste your public key where shown.
USE ROLE ACCOUNTADMIN;

-- A role that can only read your customer data
CREATE ROLE IF NOT EXISTS NVECTA_ROLE;

-- Optional: a small warehouse just for NVECTA's queries
CREATE WAREHOUSE IF NOT EXISTS READER_WH
  WAREHOUSE_SIZE = 'XSMALL' AUTO_SUSPEND = 60 AUTO_RESUME = TRUE;
GRANT USAGE ON WAREHOUSE READER_WH TO ROLE NVECTA_ROLE;

-- Read access to the schema that holds your user and event tables
GRANT USAGE ON DATABASE CUSTOMER_DB TO ROLE NVECTA_ROLE;
GRANT USAGE ON SCHEMA CUSTOMER_DB.ANALYTICS TO ROLE NVECTA_ROLE;
GRANT SELECT ON ALL TABLES IN SCHEMA CUSTOMER_DB.ANALYTICS TO ROLE NVECTA_ROLE;
GRANT SELECT ON ALL VIEWS IN SCHEMA CUSTOMER_DB.ANALYTICS TO ROLE NVECTA_ROLE;
GRANT SELECT ON FUTURE TABLES IN SCHEMA CUSTOMER_DB.ANALYTICS TO ROLE NVECTA_ROLE;
GRANT SELECT ON FUTURE VIEWS IN SCHEMA CUSTOMER_DB.ANALYTICS TO ROLE NVECTA_ROLE;

-- The user NVECTA signs in as
CREATE USER IF NOT EXISTS NVECTA_READER
  TYPE = SERVICE
  DEFAULT_ROLE = NVECTA_ROLE
  DEFAULT_WAREHOUSE = READER_WH
  RSA_PUBLIC_KEY = 'paste-your-public-key-here';
GRANT ROLE NVECTA_ROLE TO USER NVECTA_READER;
- More than one schema: Repeat the
USAGE ON SCHEMAandSELECTlines for each schema NVECTA should read. - Future grants: The
FUTURE TABLESandFUTURE VIEWSlines give NVECTA access to tables you add to the schema later, so new tables show up in Table Selector without another grant.
Step 3: Find your account identifier
NVECTA needs your Snowflake account identifier in the orgname-accountname format, for example acmeretail-analytics. It is the first part of your Snowflake URL:
https://acmeretail-analytics.snowflakecomputing.com
You can also find it in Snowsight under your account details. If you paste the full URL into NVECTA, NVECTA trims it to the identifier for you.
Step 4: Allow NVECTA through network policies
If your Snowflake account uses a network policy to limit which IP addresses can connect, whitelist NVECTA's IP addresses in that policy. To get the IP addresses, contact [email protected].
Step 5: Add Snowflake in NVECTA
Where: Settings > Data Connector > Sources > Add New Source
Select Snowflake
Select Snowflake and click Continue To Connect.
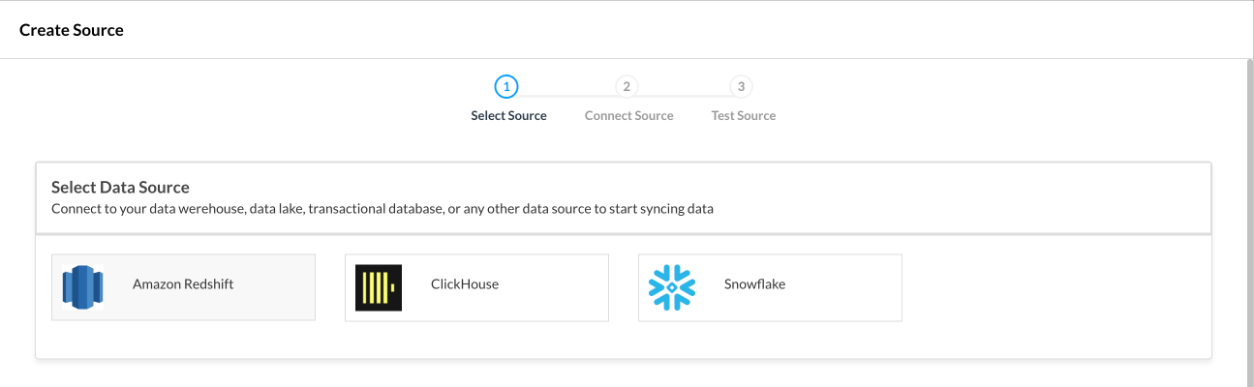
Enter your connection details
- Enter a Source Name, for example "Product analytics".
- Under Select Connection Type, select Connect directly to Snowflake.
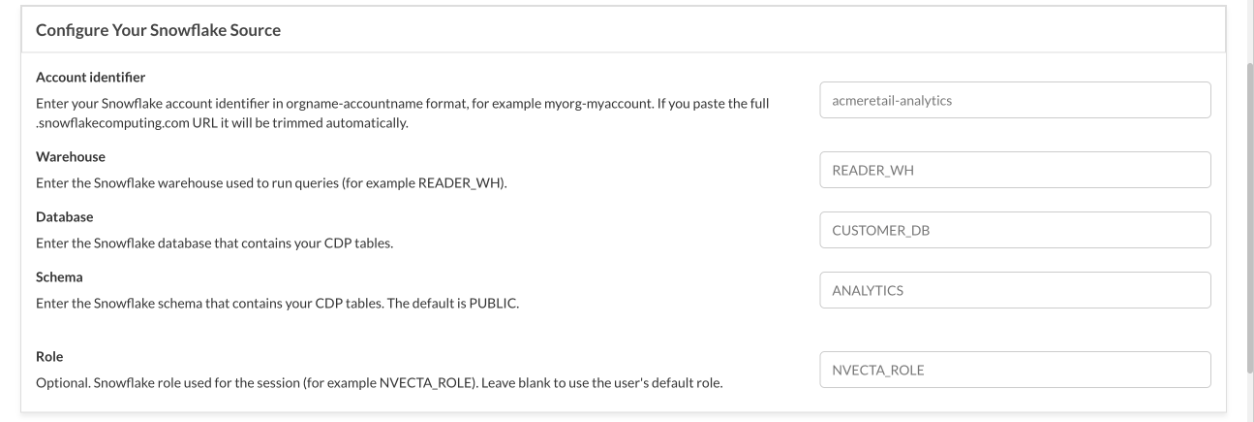
- Under Configure Your Snowflake Source, fill in these fields:
| Field | What to enter | Example |
|---|---|---|
| Account identifier | Your account identifier from Step 3. | acmeretail-analytics |
| Warehouse | The warehouse the NVECTA role can use. | READER_WH |
| Database | The database that holds your user and event tables. | CUSTOMER_DB |
| Schema | The schema that holds those tables. If you leave it empty, NVECTA uses PUBLIC. | ANALYTICS |
| Role | Optional. The role NVECTA uses. If you leave it empty, NVECTA uses the user's default role. | NVECTA_ROLE |
Provide your credentials
- Under Provide your Snowflake credentials, set Authentication method to Key Pair Authentication.
- In UserID, enter the user you created in Step 2, for example
NVECTA_READER. - In Private key, paste the contents of
nvecta_key.p8. - In Passphrase, enter the passphrase you set in Step 1. Leave it empty only if you created an unencrypted key.
- Click Continue To Test Source.
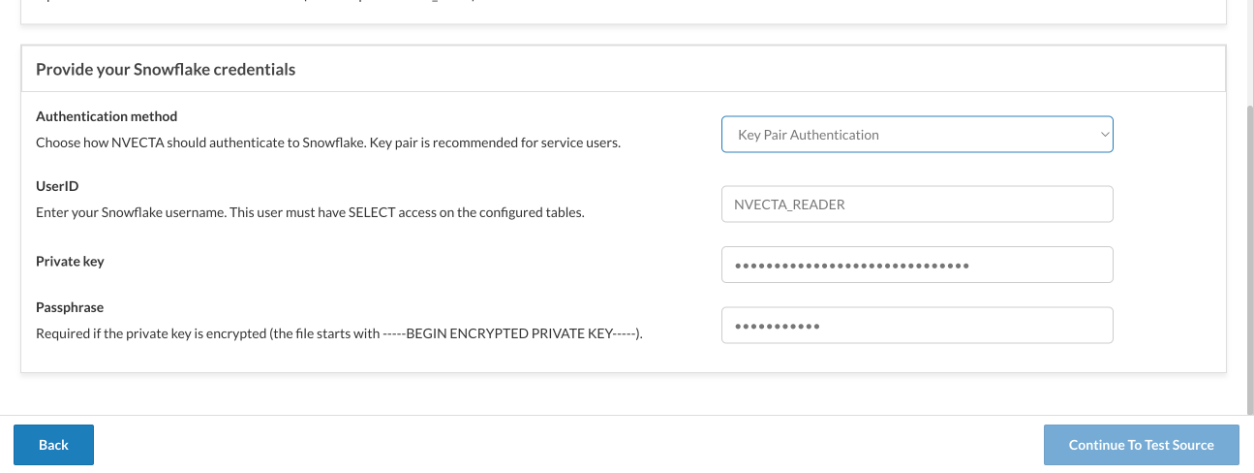
You can also choose Username / Password Authentication and enter a UserID and Password. Snowflake is moving away from password-only sign-in, especially for service users, so use key pair sign-in wherever you can.
Test the connection
NVECTA checks the connection, the sign-in and the role's permissions. When every check shows success, click Finish.
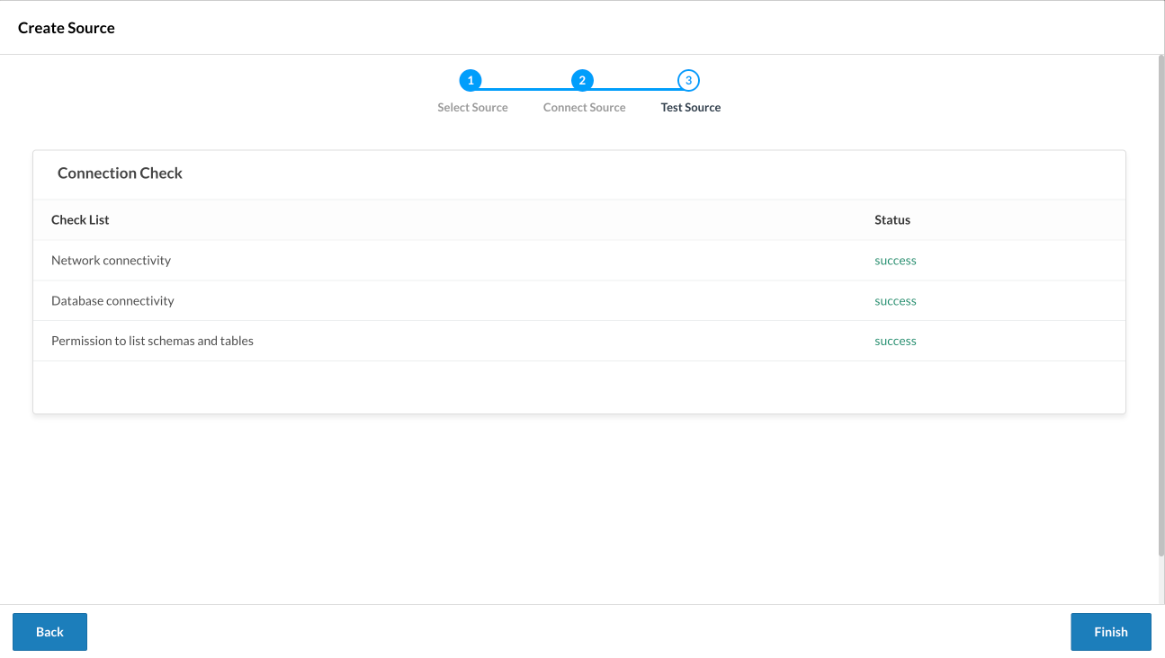
Your Snowflake source now appears in the Sources tab, ready for models.
Troubleshooting
| Problem | Likely cause | What to do |
|---|---|---|
| Network connectivity fails | The account identifier is wrong, or a network policy blocks NVECTA. | Check the Account identifier against your Snowflake URL, and add NVECTA's IP addresses to your network policy. |
| Database connectivity fails | Snowflake rejected the sign-in. | Check the UserID, make sure the public key on the user matches your private key, and check the Passphrase. If you use a password, check that Snowflake still allows password sign-in for this user. |
| Permission to list schemas and tables fails | The role cannot see the database or schema. | Run the USAGE ON DATABASE and USAGE ON SCHEMA grants from Step 2, and check the Role field. |
| Previews or models fail to run | The role cannot use the warehouse, or the warehouse is suspended without auto-resume. | Grant USAGE on the warehouse to the role, and turn on auto-resume. |
| A table is missing from Table Selector | The table is in another schema, or was created before the grants and is not covered. | Check the Schema field, and run the SELECT ON ALL TABLES grant again. |
What's next
Create a user model and your event models on this source. See Setting up sources and models.
Updated about 2 hours ago