
Setting up sources and models
This article walks you through the two things you set up before you can use your warehouse data in NVECTA: a source, which connects NVECTA to your warehouse, and models, which tell NVECTA which tables hold your users and which hold their events.
If you are new to these terms, start with Introduction to Composable CDP.
Before you begin
Have these ready before you add a source:
- A database user with read access: NVECTA connects with a username and password (or, for Snowflake, a key pair). This user only needs to read the schemas and tables you want to use.
- Network access to your warehouse: NVECTA must be able to reach your warehouse from outside your network. If your warehouse has a firewall, whitelist NVECTA's IP addresses in it. To get the IP addresses, contact [email protected].
- One user master table: A table, or SQL query, with one row per user, a column that uniquely identifies each user (such as a user ID, email or mobile number), and the email or mobile number NVECTA uses to reach each user.
- Event tables with the same key: Every event table needs a column that holds the same value as the master table's primary key, and a date or time column that records when each event happened.
To see how these tables fit together, see How user and event models connect.
Part 1: Add a source
A source is the connection between NVECTA and one warehouse. You add it once and then build as many models on it as you need.
Where: Settings > Data Connector > Sources > Add New Source
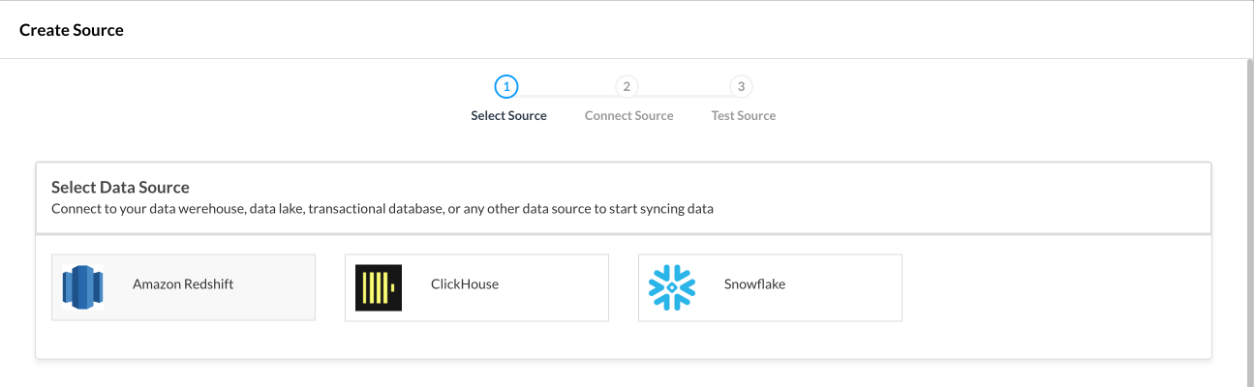
Step 1: Select Source
Choose your warehouse: Amazon Redshift, ClickHouse or Snowflake. Then click Continue To Connect.
Step 2: Connect Source
- Enter a Source Name that your team will recognize, for example "Customer data warehouse".
- Under Select Connection Type, choose how NVECTA should reach your warehouse:
- Connect directly to Redshift: For a warehouse that accepts connections over the internet. The option name changes with the warehouse you selected.
- Connect to VPN tunnel: For a warehouse inside a private network that NVECTA reaches over a VPN.
- Connect via SSH tunnel: For a warehouse inside a private network that NVECTA reaches through an SSH server (a bastion or jump host) on your side of the network.
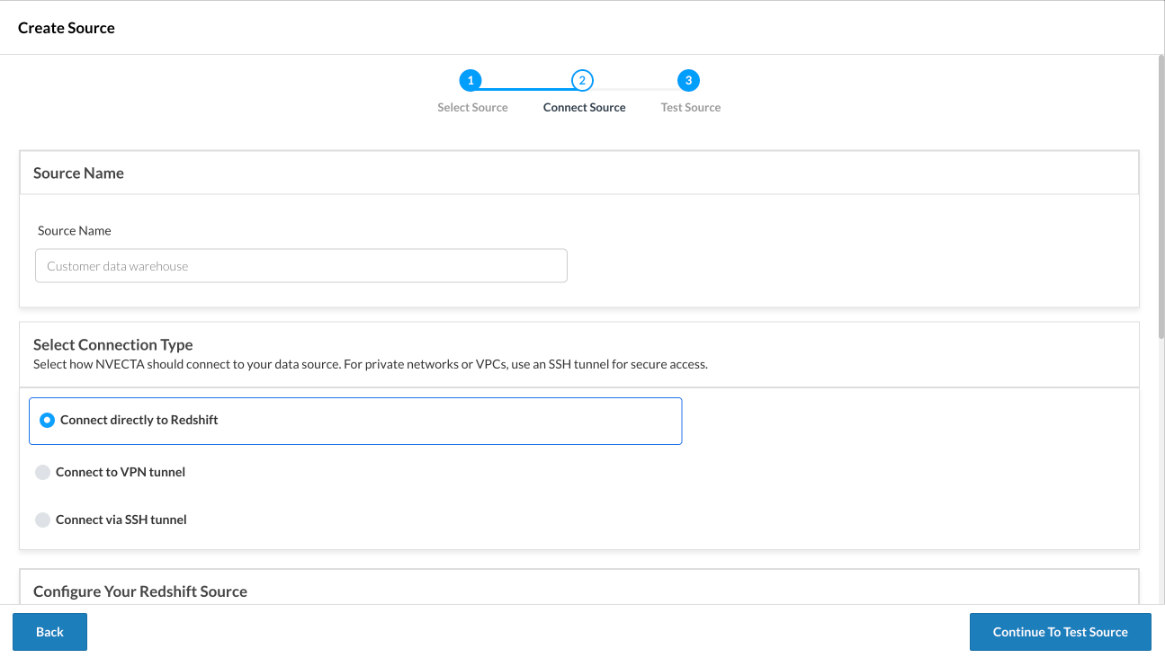
- Fill in the connection details and credentials for your warehouse, such as the host, port, database and user. The fields differ for each warehouse, so follow the guide for yours: Amazon Redshift, ClickHouse or Snowflake.
- Click Continue To Test Source.
Step 3: Test Source
NVECTA runs a Connection Check against your warehouse. When every check shows success, click Finish to save the source.
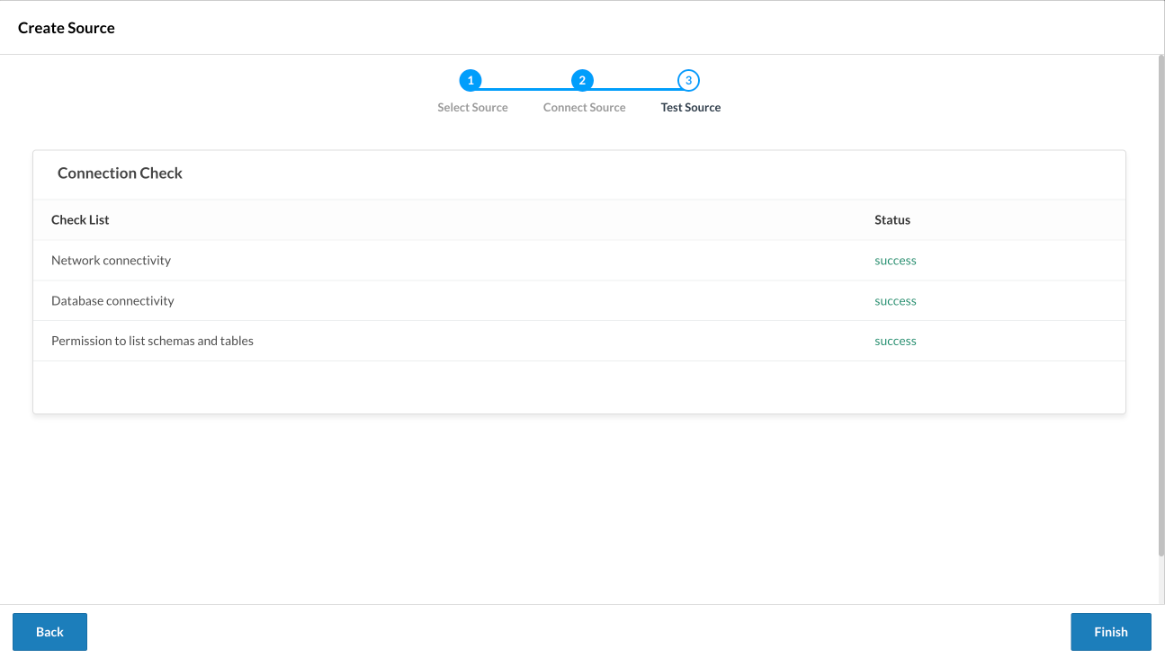
If a check fails, fix the cause and run the test again:
| Check | What it confirms | If it fails |
|---|---|---|
| Network connectivity | NVECTA can reach your warehouse host and port. | Check the host and port, and make sure your firewall, VPN or network policy allows the connection. |
| Database connectivity | NVECTA can log in to the database. | Check the database name, username and password or key. |
| Permission to list schemas and tables | The user can see the schemas and tables you want to model. | Give the user read access to those schemas and tables. |
Manage your sources
Every source you add appears in the Sources tab. Click the ... button in the Actions column to Edit a source, for example after a password change, or to Delete it. Editing a source's connection details does not affect the models, segments or campaigns built on it.
Part 2: Create models
A model tells NVECTA what a table, or the result of a SQL query, contains. Create your user model first, because every event model links back to a user model.
Where: Settings > Data Connector > Models > Add New Model
Step 1: Select Source
Select the source that holds the table, then click Continue To Preview Source.
Step 2: Preview Source
Under Select Mode, choose how to pick the data for this model:
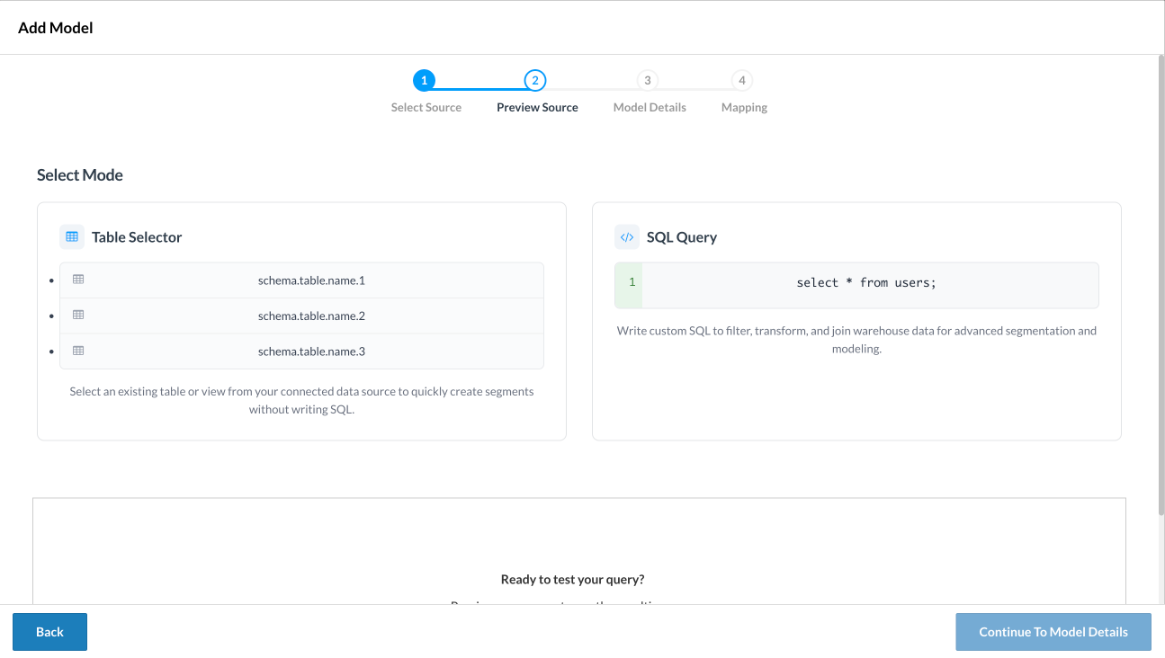
- Table Selector: Pick an existing table or view from your warehouse. Use this when a table is already in the shape you need.
- SQL Query: Write a query to filter, join or reshape data before NVECTA uses it, for example to keep only successful events or to combine two tables.
With Table Selector, click the table you want, then click Preview Source Table to check its columns and a sample of rows.
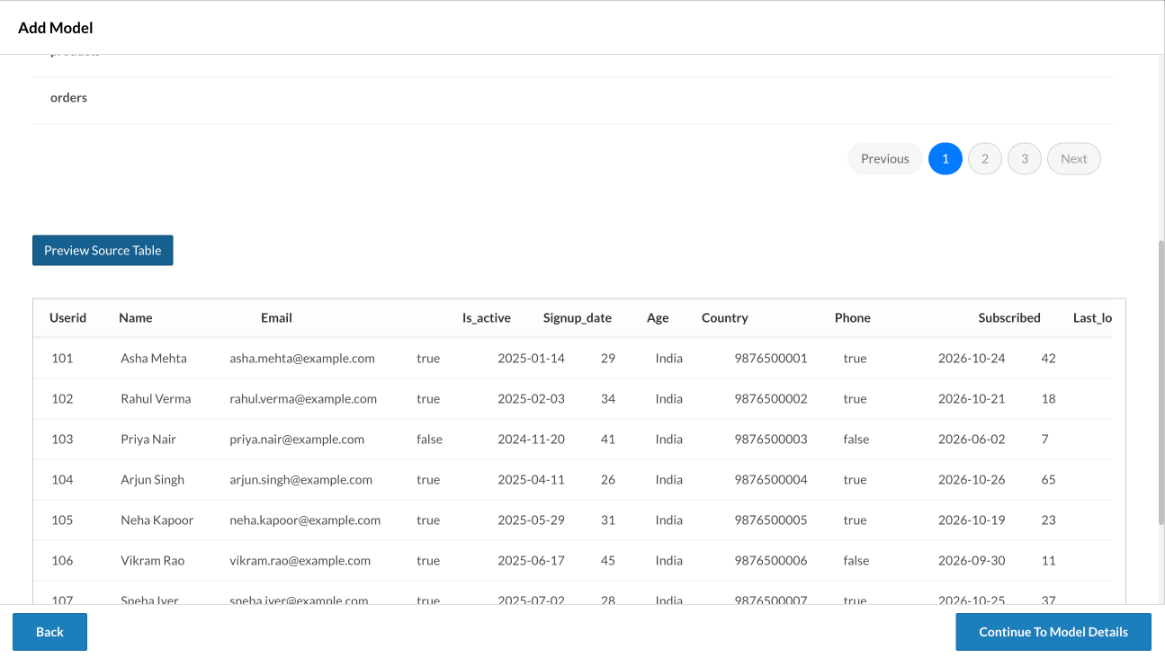
With SQL Query, type your query in the editor, then click Preview Source Table to see the rows it returns.
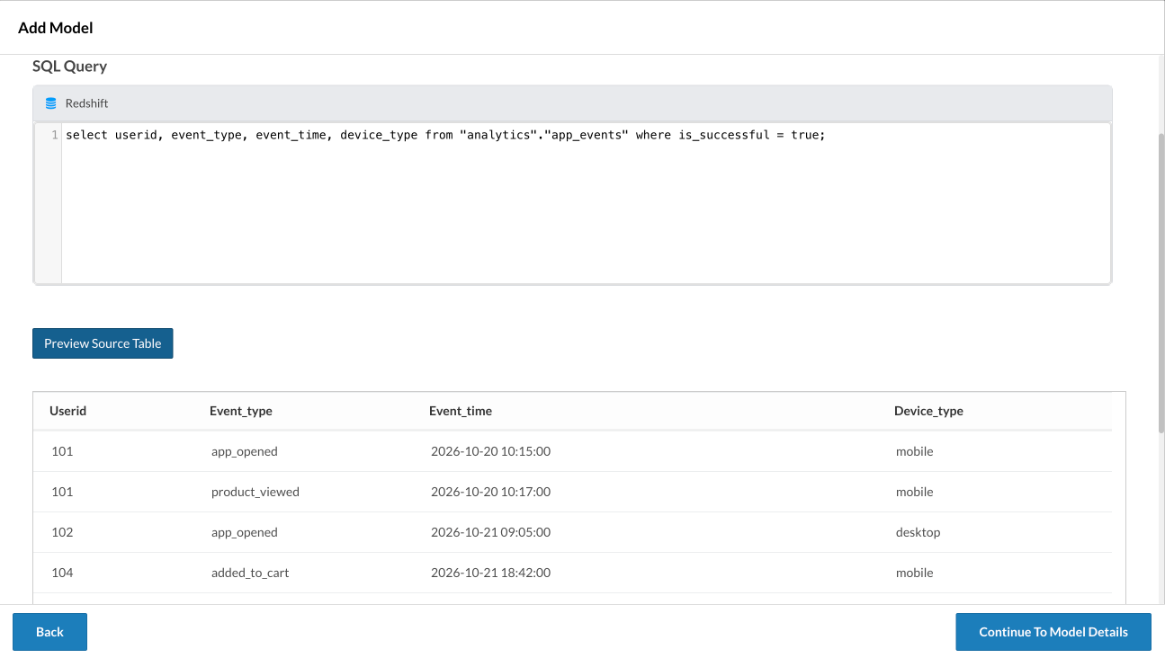
When the preview looks right, click Continue To Model Details.
Step 3: Model Details
Fill in the details below. The fields you see depend on the Table Type you choose.
| Field | What to enter |
|---|---|
| Model Name | A name that describes the data, for example "Users" or "App events". |
| Description (optional) | A short note on what one row represents, for example "One row per customer". |
| Table Type | User table for your user master table, or Event Table for activity data. |
| Primary Key | For a user model, the column that uniquely identifies each user, such as the user ID, email or mobile number. For an event model, the column that holds the same value as the user model's Primary Key. |
| Time Stamp | Event models only. The date or time column that records when each event happened, such as event_time. Only date and time columns are listed. |
| Map Identifier | Same Model for a user model, or Reference Model for an event model. |
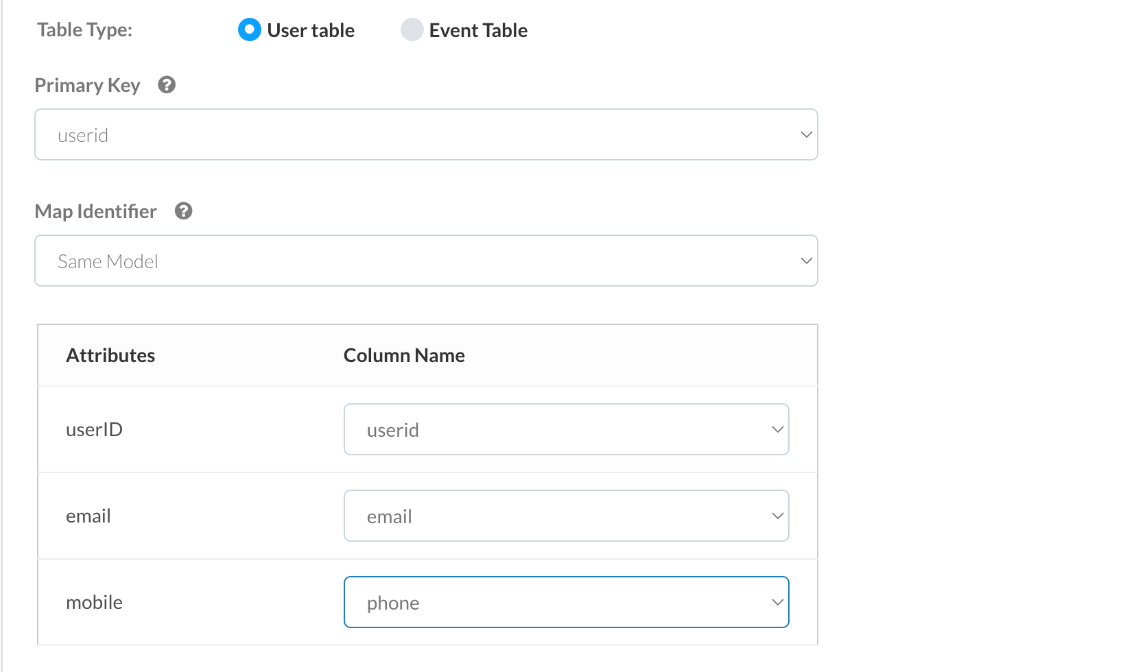
For a user model, keep Map Identifier as Same Model and match the NVECTA identifiers to your columns: userID to your user ID column, email to your email column and mobile to your phone number column. Map at least one identifier so NVECTA can recognise each user.
For an event model, select Event Table. Map Identifier is set to Reference Model. In Choose Reference Model, select your user model, then under Column Name of Reference Model select the user model's Primary Key column, so it matches this table's Primary Key. NVECTA then reads each user's email, mobile and profile from the user model.
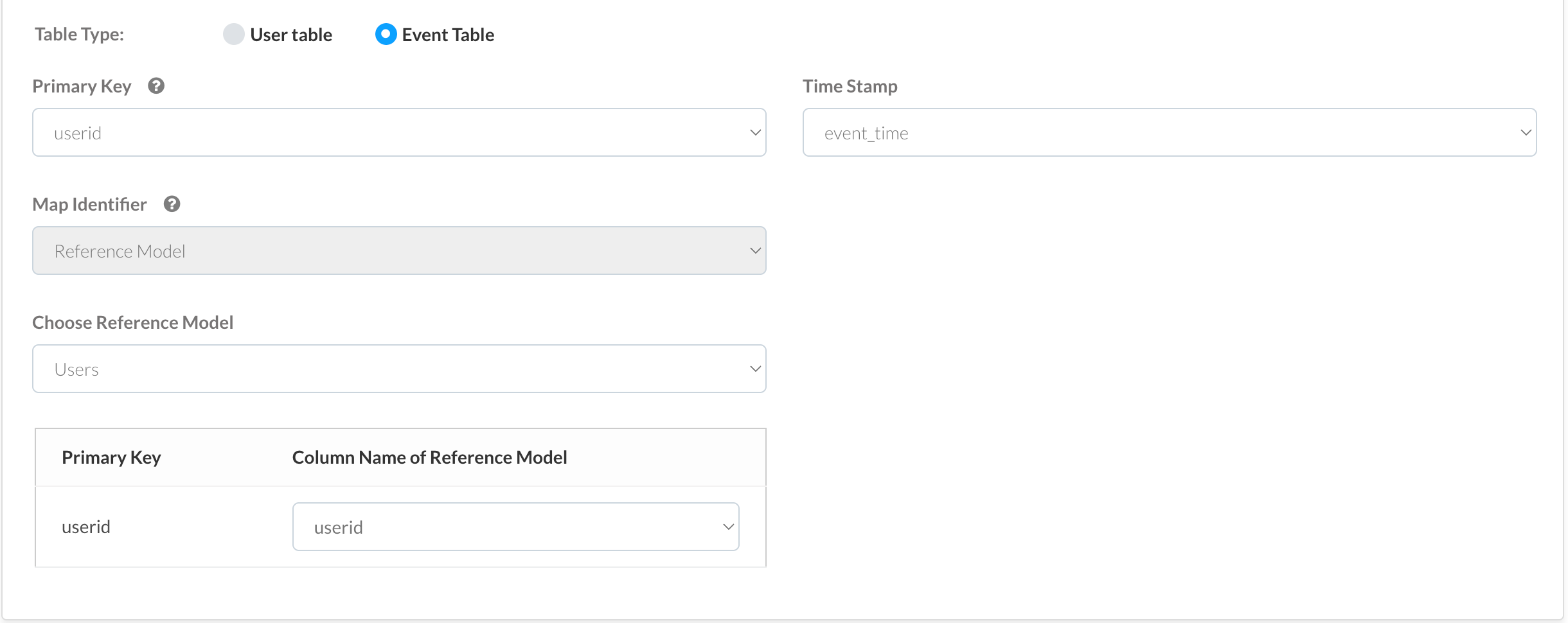
Primary Key of an event model: Use the same column that you set as the Primary Key of your user model. If your user model uses the user ID, pick the user ID column in the event table. If it uses email or mobile number, pick the email or mobile column instead. Then, under Column Name of Reference Model, select that same column from the user model. NVECTA matches each event to its user through this column, so the value repeats across rows when one user has many events.
Click Continue To Mapping. NVECTA saves the model at this point and adds it to your Models list.
Step 4: Mapping
Under Map Columns Key, review every column NVECTA will bring in:
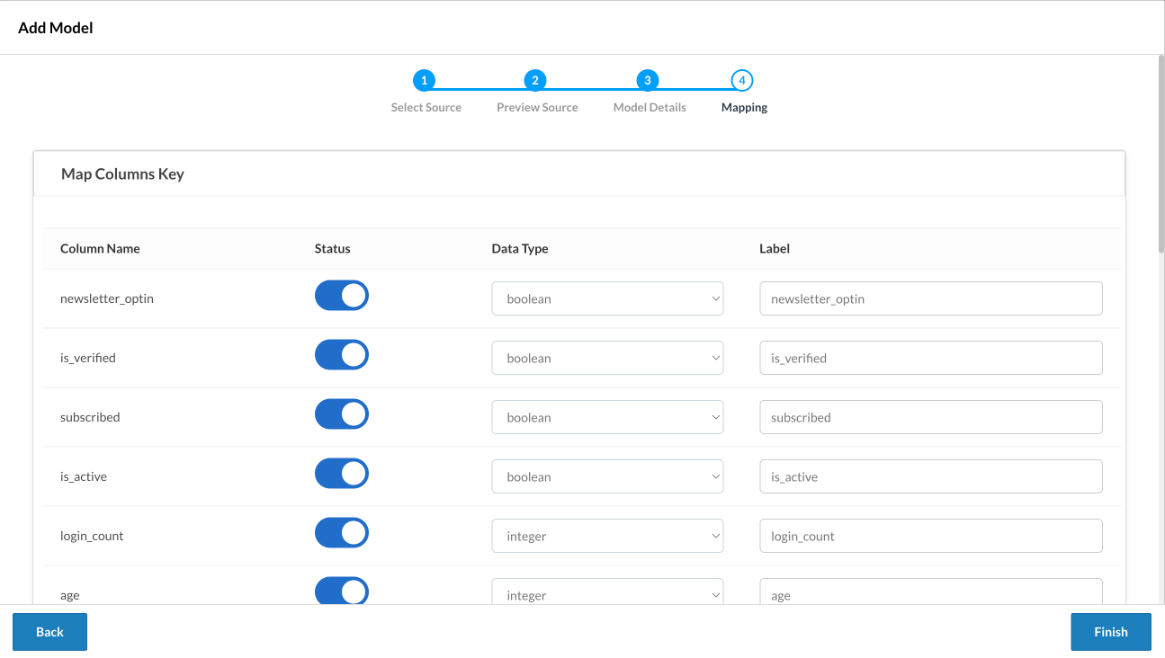
- Status: Turn the toggle off for any column you do not want in NVECTA, such as internal IDs or sensitive fields.
- Data Type: NVECTA fills this in from your table. Change it if needed: string, integer, boolean, date or timestamp.
- Label: The name your team sees for the column in NVECTA. Rename it to something clearer if you like, for example "Signup date" for
signup_date.
Click Save at the end of the column list, then click Finish.
Manage your models
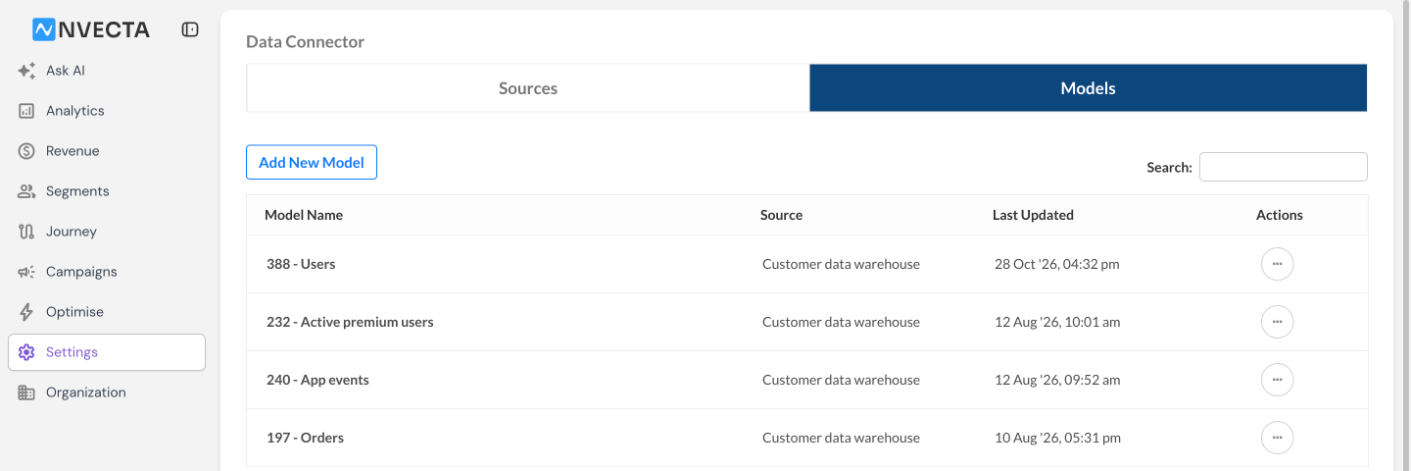
The Models tab lists every model with its source and when it was last updated. Click the ... button in the Actions column to Edit or Delete a model. Editing starts from the Preview Source step, so you can change the table or query, the details and the mapping, but not the source. Editing a model does not affect the segments or campaigns already using it.
Frequently asked questions
Can I connect more than one warehouse?
Yes. You can add several sources, including different warehouse types, and each one appears in the Sources tab.
Can I build several models from one source?
Yes. Create one model for each table or query you need, for example one user model and an event model for each activity table.
Does every table need email or mobile?
No. Only the user model needs them. Event models only need the column that matches the user model's Primary Key, and NVECTA reads the email and mobile from the user model they reference.
What happens when the data in my warehouse changes?
Models read from your warehouse, so new users and events added to the tables are picked up without re-creating the model.
Why can't I see a column in the Time Stamp list?
The list only shows date and time columns. If your event time is stored as text, convert it to a date or timestamp in your warehouse, or cast it in a SQL Query model.
What's next
With your models in place, you can build a Query Based Segment from them (see Creating Query Based Segments) and analyse model events in Insights (see Analytics with Composable CDP).
Updated about 2 hours ago